Dan and the Cone

Dan has a cyst on his toe that he is licking constantly. The vet said he needs to stop licking. A cone is the easiest way to do this, but Dan hasn’t worn a cone since he got neutered as a puppy. He’s 8 now. I haven’t done any training around wearing a cone with him, although it is now high on my list for both Dan and Doug.

Because I want the cone to be as low-stress as possible, I decided to introduce it slowly. Putting it on and leaving it on right away could be unpleasant and might result in all sorts of avoidance-behaviors or escape-behaviors like pawing it, rubbing it on the ground, or hiding when we pick up the cone to put it on. In the meantime, that we have had to use socks to prevent licking (vet-approved) for now. This is not ideal because they don’t stay on well, but Dan is more used to the socks and it seemed like the least intrusive solution while we work on the cone training.

The cone training is going faster than I expected. My best guess is that maybe our muzzle training is similar enough that there’s a bit of generalization there. We began Saturday morning and are still working on it, but I wanted to share some of the training sessions we’ve done so far.

Generally the steps I’ve used have been:

  1. Introduce the cone, yes+treat for sniffing or interacting with it. (Video 1)
  2. Put head into cone voluntarily–> yes+treat and release word “ok” for pulling head back to take it off. (Video 2)
  3. Wear cone while doing known tricks. This is something I learned from Muzzle Up!’s Maureen Backman. That by doing tricks and playing little games while wearing a muzzle, dogs can contact reinforcement for moving while wearing the thing. (Video 3)
  4. Wear cone while doing the “bed” behavior. This one I decided was critical because ideally he will wear the cone while relaxing and just hanging out. I wanted to be sure Dan could easily navigate to his bed, lie down in the cone, and get back up. It was also a way to add a little bit of duration with a stay on the bed. (Video 4)
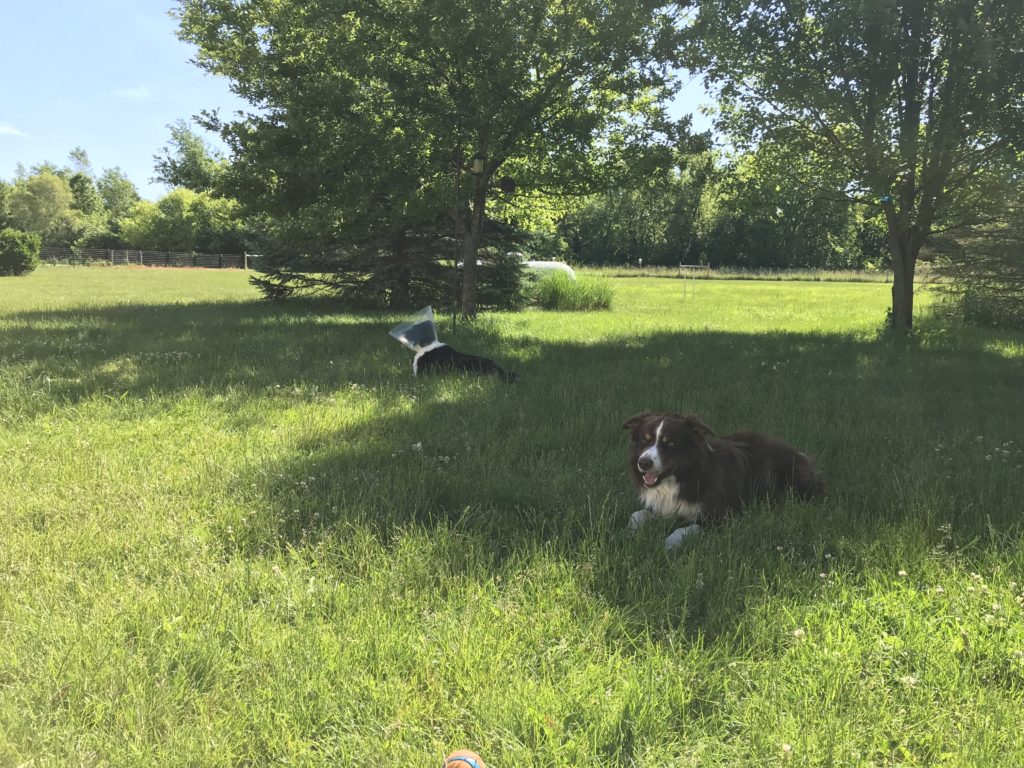
  5. Yard walk. We did a few laps around the yard together, frequent treats for coming to me when I called, a chance to try munching on grass and sniffing while wearing the cone. This went so well that I left it on for about 30 minutes while we sat in the yard together. (No video, but photos at the bottom).
  6. Sunday afternoon we tried to have him wear the cone while we watched a little TV. After about 15 minutes he began to paw at the cone. So we took it off immediately. This might be the most important part of the training. I want to be sure that Dan does not practice lots of pawing, or pulling the cone off. This is information to me that he wasn’t ready for that situation. This is one of those escape-behaviors that I want to prevent from popping up. It could be the context of the TV room while wearing the cone doesn’t have enough reinforcement behind it yet or maybe the duration was too long or maybe his foot itched more during this time. Licking has been more likely during TV time than during yard time, so that could be playing a role as well. Cone on during TV time is what we will work on next. (No video)

These steps might be different for different dogs – this isn’t meant to be a training plan or formula. I just wanted to share what I’ve done with Dan so you can see how I gradually introduced the cone. So far, he comes up to us, tail wagging, when we pick it up. My goal is for that behavior to be a lasting response to the sight of the cone and for Dan to be able to wear the cone for longer periods of time, comfortably, so that we can get a bit of a break from putting his sock on over and over again.

1. Introduction to the cone, begin head-in

2.  Practicing head in and out of the cone

3.   Tricks with cone on

4.   Practicing “bed” with cone on
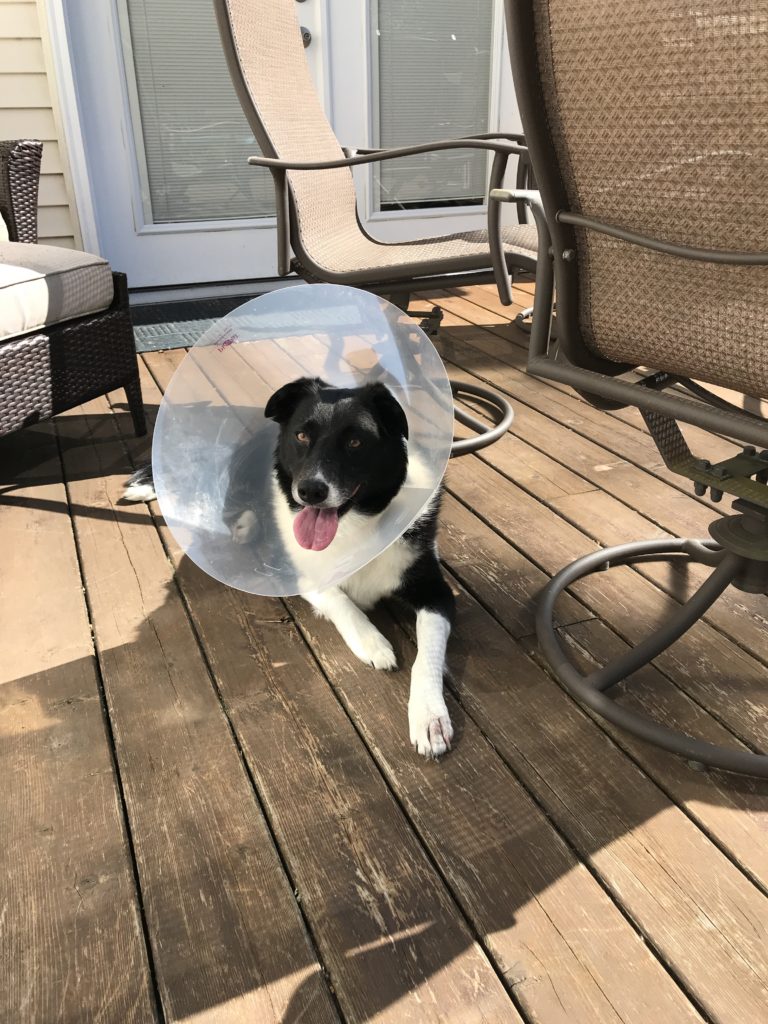
Dan on deck with cone
Dan on deck with cone – first time leaving it on for a few minutes
Dan chilling in yard with cone
Dan and Doug, hanging out in the yard. First longer duration for wearing the cone.

The most important item on my desk.

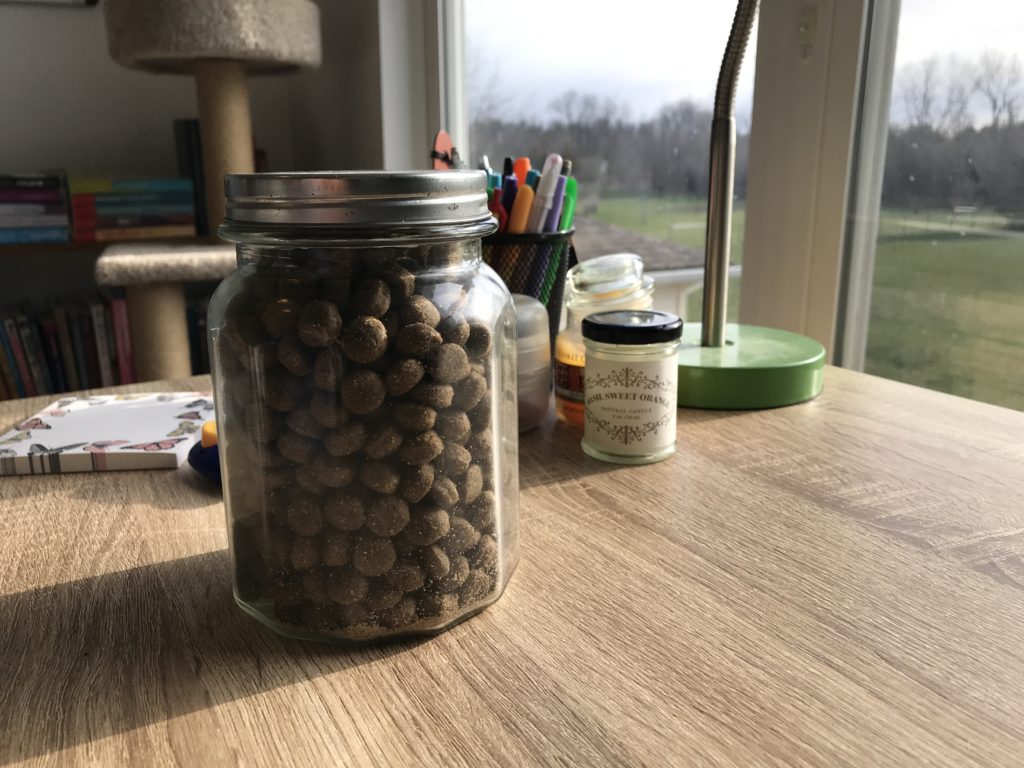
Treat Jar – A precious item

Okay, maybe I should say the most important after my computer. Without my computer, I wouldn’t be sitting at my desk!

But this treat jar is key. It allows me to be ready to reinforce nice behavior on the fly.

The problem I needed to solve: Dan historically has barked (a lot! and loudly!) at delivery people and sometimes when the neighbors dog barks or if he sees deer outside. It’s stressful for both of us and really disruptive to my work flow, especially if I’m on the phone.

So, I’ve been consistently practicing:
Hear a delivery truck, or dog = come to me for treat jar time.
When I hear the truck or dog, I call him by saying “Dan!” in a calm, happy voice. He comes running! He still might woof once or twice and thats fine with me. A few weeks ago, he started to come when he heard the truck or dog, rather than waiting for me to call him. Even better! And the treat jar made this possible.

Here’s some keys to our success with the treat jar:

Special treats.

I use a kibble or dry treat that is different from his normal food. This makes it more interesting than his typical kibble, but will still last a long time at room temperature.

Experience with the jar.

I stumbled across this when I took Julie Daniels class, “Cookie Jar Games” through Fenzi Dog Sports Academy . You’ll notice my jar has a metal screw top. This is important. It makes a very specific sound when you open it. This sound can function as a “click” – a marker to tell your dog “that’s the behavior I like!”. So if I’m on the phone, I don’t have to talk to my dog in order to mark the behavior of checking in with me, I can just open the jar.

(By the way, Cookie Jar Games is available for sale as a self study course and all $$ goes to a fund for Julie’s current cancer treatment – link is here: https://www.fenzidogsportsacademy.com/index.php/courses/4839)

How you give the treats is part of the reinforcer (part of what makes the behavior worth doing).

For Dan, it has been important to toss a few treats into his bed that is next to my desk. It sort of functions as a makeshift snuffle mat, so he can sniff around for the treats. This does three things.

  • It makes the treats more valuable, because there is a fun sniffing around activity that goes with them.
  • It also stretches out the treat experience in time. So if a truck or dog makes several noises across a few minutes, the doesn’t eat the treat and immediately run to the window and bark. He sniffs around for the treats for 15-20 seconds and then I can either toss a few more in the bed, or wait to let him offer another check in, depending on what I am doing and how intense the truck noise/dog barking is.
  • It gives a predictable place for the treats to land. So now when he hears the jar he actually stands between me and the bed. Sometimes he comes in and starts looking in the bed before I’ve gotten the treats there.

This isn’t just for barking, you can use it to reinforce any behavior you like. For example, if your dog is calmly resting in your office space, you can open the jar and place a treat near her nose (calmly). Or if your dog has stolen your underwear out of your closet, you can open the treat jar and trade treats for the underwear. Maybe give one treat to your dog directly for the initial trade, and then playfully toss a few more to add some movement (read: “fun”) into the treat-getting activity.

Finally, you don’t have to stop at one jar. We actually have 4 treat jars in our house. One by each dog’s crate for “going to bed”. One in the kitchen for calling in from outside, or going to mat while we are cooking/cleaning. And one in my office for coming when dogs bark/trucks come.

So, dig through your cupboards, pull out that nice jar you saved for something, someday, load it up and introduce your pup (and yourself) to the joy of the treat jar.

We teach sit because…

Last week, I asked the question “why do we teach sit?” The question was really meant to re-evaluate why we teach a dog any behavior. So many things we teach seem to be just the standard – a set of things every dog should know. But why?

Here’s what I think. I believe the reason we teach our dogs to sit isn’t always the reason we should have for teaching them to sit. If you take a basic obedience class, chances are you will learn to teach your dog how to sit, down, come, stay, walk on a leash (maybe), and leave it. But then what? I betcha that most people go home and don’t use most of these behaviors ever again, because they aren’t really taught how to use them.

So, why should you teach your dog to sit? Because it is a great tool! You can ask for a sit before your dog has a chance to jump up – do that every time and soon she will learn the pattern “approach person, sit, get petting”.

Some other uses for the sit behavior:

  • To get your dog to stop moving forward on leash (and therefore stop pulling)
  • To keep “4 on the floor” when there is food on the counter, a person walking in the door, or someone carrying a casserole to the table.
  • To prevent door dashing
  • To keep your dog from rushing up to another animal/child/person
  • To have your dog in a stationary spot before asking her to release a toy (can’t tug on a toy or run away with it if she’s sitting!)

I hope that by now you are thinking “hmm, every one of those items is to prevent unwanted behavior”. Yes! Exactly. The behaviors we teach our dog are all tools to ask them what we do want them to do in a specific situation. By teaching sit, down, come, stay, walk on leash, leave it, etc – and teaching them well – you have tools to direct your dog to good behavior when they might otherwise do something undesirable (to us). These are all communication tools to help our dogs understand how to live in our homes and communities without causing trouble.

I think that we need to shift our thinking about training our dogs. The purpose of taking a training class should be to learn how to live with your dog, how to ask your dog for good behavior (and therefore reduce the bad behavior) and to build a relationship with your dog.

So, the next time you teach your dog something new – think about all of the ways you could use your new tool to ask for something good from your dog!

Why do we teach our dogs to sit?

Over the past few months, I have spent a lot of time updating my group class curriculum. I have two big projects in the works that are going to require a more robust curriculum than I currently use.

The first is about to launch! I have a brand new set of classes that I will be teaching at Doggone Fun Daycare this spring. There are two main sets of classes, one for basic training and the other for agility training. These classes provide a way for students to continue on past the first class they take in a more cohesive way.

The other project is not quite ready to be announced – but check back soon for the grand reveal. It’s a big one!

One of my goals in restructuring my curriculum is to provide more useful classes for my students. To me, this means a class where the content is applicable to daily life with your dog. In the more traditional content I have been teaching, we go through all of the standard dog behaviors – sit, down, come, stay, walk on leash, leave it, etc.

But why? Why have these behaviors become the standard? Why do we teach our dogs to sit?

Leave your ideas and comments below and I will follow up with my answers to these questions next week.P1160532

52 Weeks – Week 4 – Pull open a door/drawer

Okay – we are finally back on track with Project 52 Weeks. Dan’s getting better at “hold it” all the time. We ended up using the words “take it” with a “stay” cue for now, because he already understood the “stay”. But later I am going to transition to “hold it” with the meaning of “take” and “stay”. I found that the type of object we practiced with really matters. Soft, small objects (like a tennis ball) are easier for him to hold for longer periods of time. So, we have started with those types of things and will continue to practice holding different textured, weighted, and shaped objects.

The next trick we will work on is “Pull” – this will be pulling on a rope or towel in order to open a drawer or door.

Here are the shaping steps:

  1. Take your rope/towel by itself first – don’t attach to a door yet.
  2. Hold it near your dog and click/treat for any interaction with the object.
  3. Hold it near your dog and click/treat for mouthing or biting the object.
  4. Hold it near your dog and when he bits it, tug slightly and then click/treat.
  5. Now let him be the one to tug on the object to earn a click/treat.
  6. Next attach the rope/towel to a door. Take your dog near the door and hang out. When he pulls a little, click/treat.
  7. Next wait for him to pull increasingly harder to earn a click/treat. Work up to enough strength in the pull to open the door. Drawers are likely to be more difficult, especially if they are full – We are going to start with doors and then try drawers.
  8. When he can open the door/drawer all the way, add the cue “pull” or “open”.

Don’t forget to share your photos on my facebook page!

Week 3 – Update

Hi All,

If you’re following along you are probably wondering where the week 3 recap is!  Last week I had a pretty bad cold/flu bug and we didn’t get much training time in.  So, Dan and I are repeating week three and still working on “hold it”.

Interestingly, this is turning out to be pretty difficult for Dan.  Getting any amount of duration for holding the item is tricky.  He wants to grab the item at the back of his mouth and toss it around or spit it out immediately.  It’s a little surprising to me because he carries his toys around all the time.  So, our shaping sessions are turning into “micro shaping” sessions.  I am working on clicking only when he grabs the object with the middle of his mouth and in a gently manner.  If he’s snatching it rapidly and sloppily he can’t hold it for very long.

We will keep working and have another update later this week.

Laura

“Hold it” – Week 3 Training Steps


Okay, in case you need a little help with training this one – here’s the shaping steps I am using.  Dan is pretty good at grabbing things when asked because we’ve practice that in the past so we are focusing on the last few steps involving the build up of duration.

Target Behavior: When I hold an item out and say “Hold it”, Dan will grab it with his mouth and hold on until released.

Shaping Steps:

  1. Choose one item to begin the training with. Ideally it will be something that is easy for your dog to hold in his mouth, perhaps even a toy that he is used to picking up.
  2. Hold the item out and if your dog moves towards it click/treat.
  3. Next wait for an open mouth reach towards the item before you click/treat OR a sniff, lick, nudge if you can’t get the open mouth right away. The idea is that he needs to interact with the item at least a little. (No more than 3-4 interactions that aren’t closely related to grabbing with his mouth.)
  4. You should easily be able to move from open-mouth reach to actually closing his mouth on the object. Click/treat for mouth closing.
  5. Now you’ve got the grabbing part! Next build duration. Wait to click until he has held onto the object for a second or two.
  6. Slowly build up duration a few seconds at a time until you reach your goal. As you build the duration, it can help to sometimes go back and do a shorter duration so that it isn’t too predictable for your dog.
  7. Now add the cue “Hold it. Begin by saying the cue when you present the object. Click/treat for a hold behavior (at least a few seconds)
  8. Finally – repeat with lots of different objects! Sometimes you might have to go all the way back to step one, but other times you might be able to jump right to step 7. It depends on your dog’s history with holding things and the type/texture of object (among many other variables).

Enjoy!

Laura

Toys as Reinforcers

Sometimes, a toy can be more practical or more rewarding than a food item. However, it takes practice to use a toy as an effective reinforcer. Remember – the dog decides if it is reinforcing, not you! If he isn’t interested or the target behavior isn’t increasing, then it isn’t a reinforcer.

Before you can use a toy as a reinforcer you need to understand what about the toy is exciting to your dog. There are several ways for your dog to interact with a toy:

  1. Holding the toy
  2. Chomping/Chewing on the toy
  3. Tugging with the toy
  4. Chasing the toy while you wiggle it
  5. Chasing a tossed toy
  6. Catching a toy in the air

Here’s a video example of Dan doing each of these:

Try each of these little games with your dog and see what he enjoys. Try to rank them in order and mark games your dog didn’t have much interest in with an “x”. Now, play each of them again in a brand new place and rank them – did the order change? Are there more or less “x”s?

Sometimes the type of toy alters the type of game your dog might like – for example, he might like to chomp on a ball better than catching it in the air. But he might like to catch a Frisbee in the air better than chomping on it.

List 5 of your dogs favorite types of toy and try to write down the top game for that toy.

How you deliver the toy can affect the behavior you get, just like the placement of a treat can affect the behavior. For example, if you are working on “4 Feet on the Floor”, be sure to present the toy from below your dog’s nose. If you hand it to him from above, he will be likely to jump up to get it!

Just like with treat training, you should use a reward marker for the behavior you like with toys too. You can use a clicker, the word “Yes!”, or the word “Good!” with both toys and treats. Just be sure the toy/treat is reinforcing so that the clicker doesn’t lose it’s meaning to your dog!

Another important piece of training with toys is to be sure that the toy is valuable. One way to help with this is to purchase 3-4 toys that are just for rewards in formal training sessions. Most dogs prefer new toys to the toys they play with all the time. My dog even prefers a new Chuck-It ball to an older Chuck-It ball! Be sure to have a variety in your toy reserve – a ball and several tug toys with different textures might be a good idea. That way you can add variety to the toy reward too. This is just like the concept of choosing a high-value treat for practice with distractions or difficult behaviors. I often suggest using boiled chicken or string cheese when you aren’t training at home, because these treats are extra special for most dogs!

Finally, and most important, be sure to carry out the game for a bit with your dog during each reinforcement period. Most of the time, just giving your dog the toy won’t be reinforcing and therefore won’t accomplish anything. The interaction with the toy is the reinforcer, not just the presence of the toy.

One Last Note:  What if your dog doesn’t like toys or doesn’t play any of the games? You can teach him to enjoy these things, but it will take a little practice. One strategy is to use a toy that can hold food so that you can transfer the value of food to the toy. Another strategy is to give food as a reinforcer for engaging in play (you may have to shape this in the beginning). Squeakers, fur-like material and even the scent of a toy that another dog used can all increase interest in the toy for some dogs. It is worth your while to work on building value in at least one or two of the toy-play games so that you have a variety of reinforcers in your toolbox.

Project 52 Weeks

As a professional dog trainer, there are times where I am so busy with clients’ dogs that training my own dog falls by the wayside. When I do work with Dan, we are often working on a long-term goal – an agility skill, working on calmness around other dogs and people, etc.

I have been thinking about ways to focus more on simple fun with Dan and also to teach him some skills, tasks, or behaviors that I haven’t taught before.

Sometimes I will get on a roll and teach Dan a new trick, but this really only happens a few times a year. When we do this, he learns it quickly – in a week or less! He is happier because he’s gotten some focused, fun attention and it’s easy to practice indoors in the winter when he might otherwise not get enough exercise.

Putting these thoughts all together, I have decided to start “Project 52 Weeks”. I am going to teach Dan one trick/skill/behavior/concept per week for the next year. And, I want you all to try it with me!

Here’s what I will do:

  1. Sunday evenings I will post the behavior of the week.
  2. Tuesday mornings, I will post the training guide/shaping steps
  3. Thursdays I will post Dan’s progress and the following Sunday when the new trick comes out, I will post a video of the last trick.

Here’s your part:

  1. Sunday evenings, look at the behavior of the week – try to come up with a training plan
  2. Practice it Monday/Tuesday
  3. Tuesday you can look at my training plan and compare it to yours. Modify yours as you like and keep practicing!
  4. Sunday, post a video of the final behavior (or the progress you’ve made) on my page. Everyone who posts a video will have his or her name entered into a monthly drawing to win a cool dog book, toy, or treat. The behavior doesn’t have to be perfect in order to post a video, just a start.
  5. If you aren’t able to do it every week, that’s okay – join us when you can!

The main event will take place on my Facebook page, but I will post a weekly update on the blog too so you can all follow along with what’s happening.

Sunday, September 27th will be the real start date with the first drawing taking place October 31st. We will get a head start on the first week with the trick: Cross Paws in a Down like this adorable Boxer.

Paws Crossed

Week 1: Paws Crossed

Hope you can join us in learning some fun new tricks with your pup!

Laura

What’s In A Click?

What’s in a click?

Well – nothing! Until you build the value into that noise, it means nothing to your dog.

How to build value in the click?

Before you can start to use a clicker, you have to introduce it to your dog. Here are the steps I like to use:Clickers

  1.  Take the clicker and click it a bunch of times before you go get your dog. This gets your “clicks out”. So many people want to play with it when you first hand it to them that this is always the first thing I do with my students ☺ After this you should never, ever click without giving a reinforcer afterwards.
  2. Now, get your dog and a handful of treats. You can use his kibble if you want to (and if he likes it).
  3. Click without moving your hands at all. Then pick up a piece of kibble and give it to your dog. Repeat until you have used up your handful (maybe 20 times).
  4. Now, when you dog isn’t looking, try to click. If he looks toward you, he’s got it. If not, do step 3 again until he’s got it.

*Important Note – even though your dog is just learning what the click means, you can still reinforce unwanted behavior when clicking and treating in this exercise.  It doesn’t matter much what your dog does during this exercise, as long as he isn’t jumping/barking/trying to steal food from your hand/etc.  Only click if he is doing something you wouldn’t mind him doing again.*

NOW, what’s in a click?

Once you have introduced the clicker, here’s what it can mean:

  1. Marker or Bridge: “That is exactly correct!”  The moment you click captures the behavior your are reinforcing.
  2. Positive Reinforcer: “Oh boy a treat (or other reinforcer) is ready for me!” Every. Single. Click. Should be followed by a treat or later another reinforcer. But it has to be a reinforcer, so start with treats. More on that in another blog.
  3. Cue or Discriminative Stimulus: “Better go get the treat!” The dog should orient toward the place where the treat comes from. This might be you, a spot on the ground near your dog, or maybe the treat comes to your dog so he shouldn’t move at all.

So, the click is a great communicator and in just that one little moment, your dog gets all of this information.

Why a click?

Some people are hesitant to use a clicker, after all it is one more thing to carry and try to hold onto with a dog’s leash, treats, poop bags, keys, etc.
But, the clicker is an excellent tool because:

  1. It is super fast. Your words are slow, but the click is quick. Just like your wiggly puppy. This makes timing the click much easier than timing a verbal bridge.
  2. It sounds like nothing else. It is only used in training. Verbal praise can often get overused in everyday interactions, but the click is saved for times when you definitely have a reinforcer available. This gets your dogs attention!
  3. It cuts through other noises quite well. In busy environments with noisy traffic, crowds, or barking dogs, the click is easy for your dog to notice.
  4. It helps the trainer (you) to pay attention to what you are trying to reinforce. Since it is such a pinpointed stimulus, you are likely paying more attention to try to get that click to happen at just the right moment.

Your backup clicker

A clicker is not magic. It is just a tool. There are places where it is the best tool and other times where there are better tools. And times where you forget to bring your tool!

Because of this, I always teach a verbal marker to use as a “backup clicker”. I use the word “yes!” and I say it in an enthusiastic, punctuated tone that is almost the same every time. Differently than my dog would hear me say “yes” when I am talking on the phone, chatting with my husband, or while telling him he is “suchagoodboy”.

Some people use the word “good”, “bravo”, or make a clicking noise with their tongue (this is what I do with the cat).

Whatever you choose for your backup clicker; teach your dog the meaning of this noise just like you did with your clicker. Then you will always be prepared if you need a different tool or leave your clicker behind.

So, go get your clicker (most pet shops have them), and start building value.  Then teach your dog something new!

Happy Training,

Laura